Ah, summer storms may bring much-needed rain to your garden or offer that cozy thunderstorm vibe for a night in, but they can also wreak havoc on your roof. Whether it’s hail, wind, or heavy rain, your roof takes the brunt of the damage when it’s extreme. And once the storm clears, you’re left with a critical question once you know that you have damage: How do I file a roofing claim?
If you’re feeling overwhelmed at the thought of dealing with insurance, don’t worry—you’re not alone. Filing a roof damage claim after a storm can seem like navigating a maze of paperwork, estimates, and adjuster appointments. But with the proper preparation, a little know-how, and some patience, you can get the help you need to restore your home to its pre-storm condition—and potentially save money.
In this comprehensive guide, we’ll walk you through the entire process of filing a damage insurance claim, from documenting the damage to working with your insurance adjuster and choosing the right contractor. Let’s dive in!
Step 1: Assessing the Storm Damage to Your Roof
First things first: before you even think about picking up the phone, call your insurance company, take a deep breath, and assess the damage. Your insurance claim’s success will rely heavily on how thoroughly and accurately the roof damage is documented. Here’s how you can file an insurance claim for roof damage after a storm:
1.1. Don’t Rush Out Immediately
You might be itching to check your roof right away during a storm. However, safety is key. If the storm is still active or there’s a chance of additional weather events, wait until the weather clears, and it’s safe to go outside. Never attempt to inspect your roof during active storms or when conditions are unsafe.
There… we said it.
1.2. Look for Obvious Signs of Damage
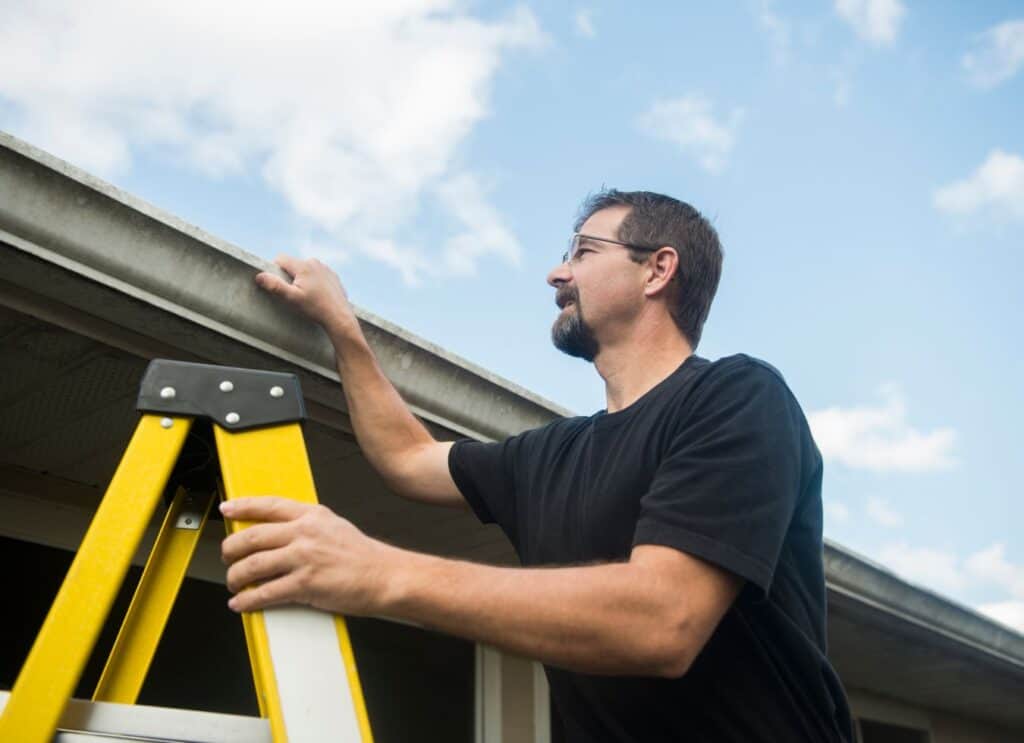
Start by inspecting the roof from the ground level. Walk around the house and look for damage. For the roof, you can use binoculars if you have them to avoid unnecessary climbing, or if you have a second story, you can look out the windows that overlook your roof, other windows, siding, and more. Look for noticeable signs of damage like:
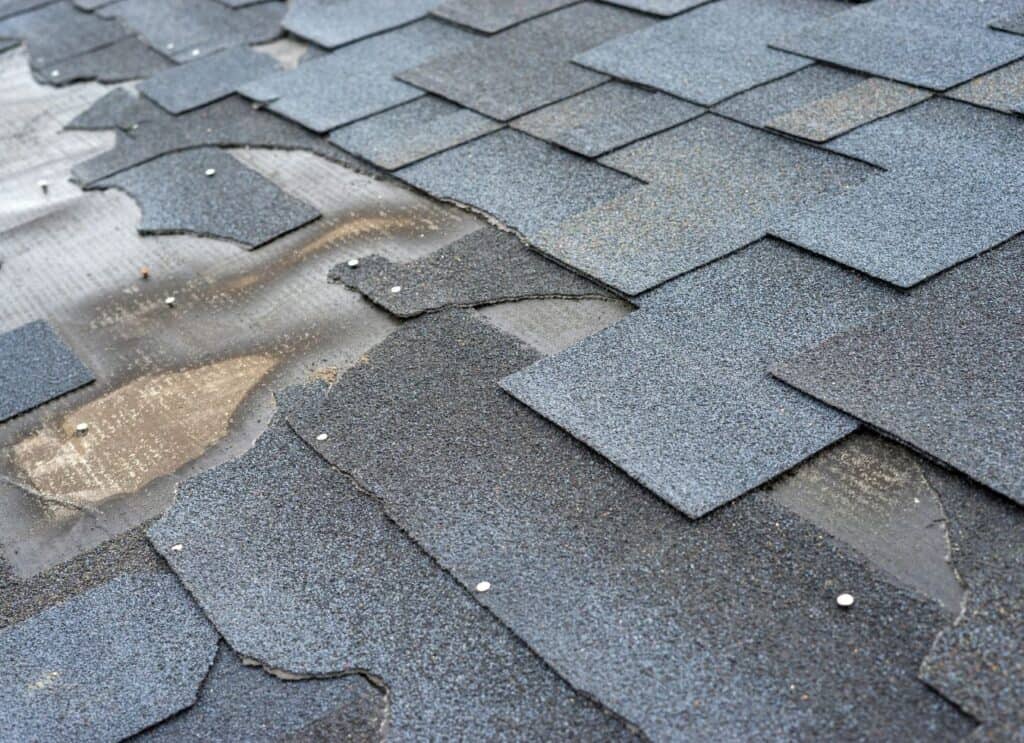
- Missing shingles or tiles
- Bent or broken metal flashing
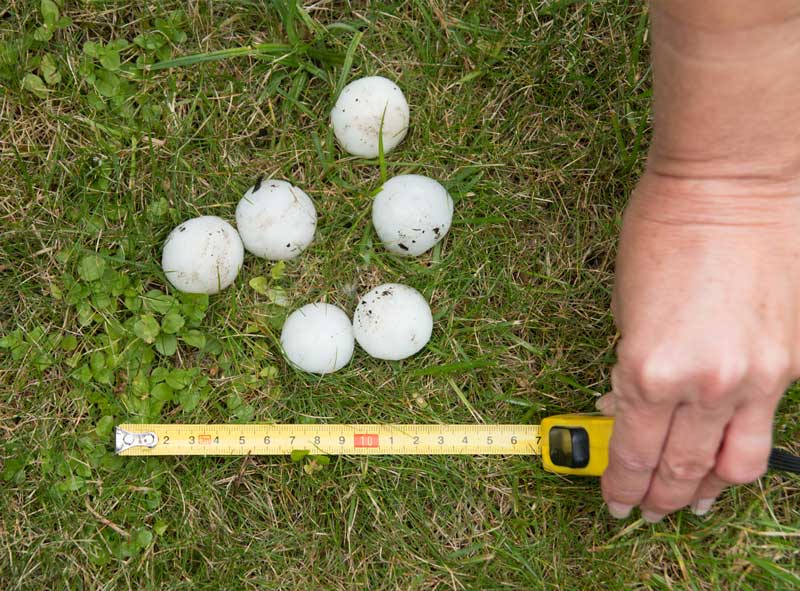
- Dents or cracks in shingles, especially from hail
- Cracked or missing gutter sections
- Water stains inside the home, which could signal leaks
- Broken window panes
- Hail splatter marks on siding and fencing
- Paint dents or chips
1.3. Document the Damage
Take clear, dated photos from multiple angles to document the damage. Be sure to include:
- Wide shots of the roof from different angles
- Close-up shots of damaged shingles, tiles, or metal roofing
- Any other affected areas, such as gutters or fascia
- Interior shots showing water leaks (if any)
- Look at the windows, siding, and paint to see if there is other damage
Don’t forget to take a few wide shots of your neighborhood. If a storm affected multiple homes in your area, showing that hail damage is widespread can help validate your insurance claim for roof damage.
Tip: If you can’t safely access your roof or don’t feel comfortable doing so, call a professional roofing contractor like Denny’s Roofing to inspect it. You don’t need to go up there. We Inspect immediately and perform the initial inspection for FREE.
We will also help document inspection damage with a professional eye and provide an idea of what your insurance company will come up with as a “scope of work” estimate for repairs.
Step 2: Contact Your Insurance Company
Once the damage is documented and an expert Project Manager from Denny’s Roofing inspects your roof, we will inform you that it’s time to contact your insurance company. It’s essential to act promptly if you have extreme damage — and many insurers have time limits for filing storm damage claims. Most are at least a year from the date of loss, and State Farm even gives you two years to complete repairs. So, make sure you file your claim promptly after the storm.
Again, talk to your Denny’s Roofing Project Manager so that they can give you a good idea of when to file a claim. Please don’t do it until you confirm the damage with an expert who knows what to look for.
2.1. Know Your Policy
Before you call your insurer, take a few minutes to review your homeowner’s insurance policy if you have it. Look for these key sections:
- Coverage for storm damage: Some policies may only cover particular storms (e.g., hail or wind).
- Deductibles: Depending on the policy, you may have a higher deductible for roof damage due to storms. Know how much you’ll need to pay out-of-pocket before your coverage kicks in.
- Exclusions: Check for any exclusions oration that would prevent storm-related damage from being covered (like wear and tear, neglect, etc.)
It’s always good to be informed so you know what to expect when talking with your claim adjuster when they come out to inspect their records. If you are unsure what to look for in your policy, you can call your insurance agent, talk to the claims agent, or call us at Denny’s Roofing, and we will explain it all to you.
We are experts in the insurance claims process. We even have people in our office who only deal with Insurance claims. It’s a daunting process at first, but take one step at a time and contact us so we can help you.
2.2. Make the Call
Once you’re ready, contact your insurance company to file your claim. You can typically do this by calling their claims department or using their online portal if they have one.
When speaking with the representative, be sure to provide:
- The date and time of the storm (if you don’t know it – your Project Manager will)
- Your policy number
- Details about the damage. Be specific. Mention the roof damage you’ve noticed, including missing shingles, cracks, leaks, etc.
Don’t be afraid to ask questions about the claims process—this is your home, and you want to ensure everything is handled correctly. Ask how long the process will take, what documents are required, and how to schedule the inspection.
Step 3: Work with Your Adjuster
After the inspection claim, the next step will be talking with an insurance adjuster from your carrier that will be assigned to your claim. An adjuster is a professional from your carrier who will inspect the damage, assess the cost of repairs, and determine whether your claim is approved. They will document as much damage as they can find. They also miss items that should be included in their initial estimate.
3.1. Schedule the Adjuster’s Visit
The insurance company will assign a Field Adjuster to visit your home to evaluate the damage. We highly recommend having a Denny’s Roofing Project Manager at the InsInspection to ensure your insurance adjusts and inspects the damage you and your Project Manager see. It’s good if you are home for the inspection. You can walk through the damage with the inspection manager and answer any questions they may have. And if you can’t attend, Denny or someone on his team will be there to ensure it all goes as it should. You will have expert representation from a licensed roofing company. We promise.
3.2. Be Prepared to Answer Questions
When you talk to your adjuster before coming out, they may ask you questions about the storm and the damage to your roof. Be honest and thorough, but keep in mind that they are looking for specific details about the damage, so:
- Don’t overstate the damage: Only mention what you have documented.
- Be clear about the storm’s severity: If you live in an area known for hail or wind, highlight the storm’s strength. They will know how damaging the storm was when they get out to look. They will have pulled specific reports and most likely have done other inspections of one of your neighbor’s damage, too. Each home is different because of the materials used on your roof. So, you may or may not be affected just because you see other folks having issues.
3.3. Understand the Adjuster’s Report
After the inspection, the adjuster will write a report and inspect your insurance company. This report will include an estimate of the repair costs. You should receive a copy of this report detailing what’s covered, how much the insurance company is willing to pay based on what they have inspected, any exclusions, and any areas that might require what are called “supplements.” These expenses will be added to the claim as your Contractor proceeds with the repairs.
Tip: If you or our Project Manager disagree with the adjuster’s findings or the estimate seems too low, your Project Manager will see the issue and challenge the decision on your behalf. Don’t be afraid to bring us in to be your advocate as a professional and provide an expert opinion if you haven’t already done so.
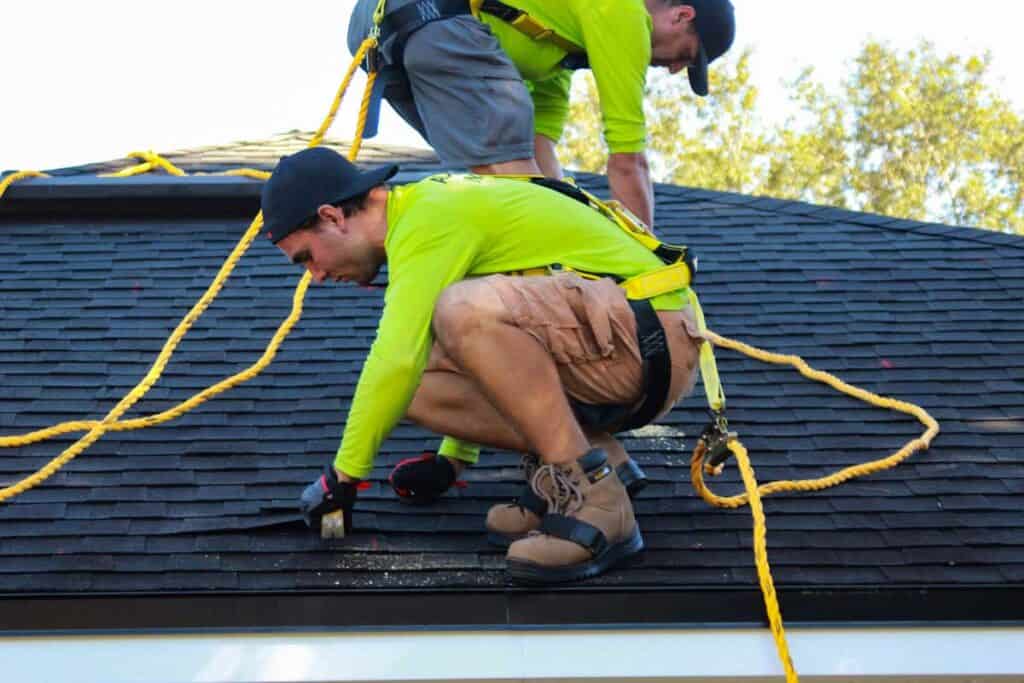
Step 4: Hire a Roofing Contractor
Once your insurance company has approved your claim, you can officially hire us as your contractor by signing a contract for the specific work and using the Insurance company’s Estimate to make the repairs.
The fun part begins with choosing the right roofing contractor, like Denny’s Roofing, to fix the damage. The key is finding someone who’s experienced, reliable, and, preferably, already working with your insurance company and a good communicator.
4.1. Should I Get Multiple Estimates?
Roofing repairs with an insurance claim differ from regular construction, especially if you have received a recommendation from your Insurance Agent or a friend. Recommended Contractors have been vetted and will do great if you get along with them.
Please do not hire a door-knocking contractor without doing your homework. Make sure they are local to Colorado and have a good reputation. Storm chasers from out of state come and go. Do not make that mistake.
Suppose you don’t have someone who highly recommended it. In that case, it can be a good idea to get at least two or three companies to send out representatives who can look at your roof and give you their opinion to get a feel for how they see your claim, especially if you have picked up your contractor off the internet. This gives you a better sense of their process.
All Insurance claims are paid out at the same rates based on local labor and material costs configured into the estimate. So, getting an estimate after you have received one from your homeowner’s insurance company is redundant. Remember, however, that price shouldn’t necessarily be a consideration—look for a contractor with a solid reputation for quality work and someone who is professional and responsive.
Your Insurance company fixes pricing. Contractors all get paid the same thing.
4.2. Work with an Insurance-Friendly Contractor
Many roofing contractors have experience working with insurance claims. They understand how the process works and can help guide you through it. A good contractor will:
- Look for vetted sub-contractors (if needed) who are licensed and insured
- Ensure that your claim is processed promptly so the repairs can be completed
- Offer an artistry warranty on the new roof
4.3. Understand Your Deductible
When you receive the estimate from the contractor and have an RCV policy, remember that your insurance company will typically only cover the cost of the repairs after your deductible is applied. If your deductible is $1,000, for example, and the repairs are estimated at $5,000, you’ll pay $1,000 out-of-pocket, and your insurance will cover the remaining $4,000.
Not sure… Contact your Denny’s Roofing Project Manager for help.
Step 5: Finalizing the Claim and Repairs
Once you’ve chosen a contractor and signed a contract authorizing them as your Roofer/Contractor, they will get a permit from the city or county to begin the roof repairs. Be sure to communicate with your contractor and insurance adjuster throughout the process. After the repairs are completed, you’ll need to have your contractor submit the final invoice to your insurance company to release your depreciation, which the insurance agency has held back to ensure that you completed the majority of the repairs.
5.1. Review the Final Invoice
Ensure the final invoice matches the estimate provided and that all the work has been completed to your satisfaction. Go over the line items in the insurance estimate with your Contractor. Once your insurance company receives the invoice, they will pay the remaining balance. They will send you a check that you can then pay your contractor.
Other Popular Questions We Receive About Roof Replacement and Roof Storm Damage
Q: What should I do as soon as I suspect roof damage?
A: As soon as you suspect roof damage, it’s essential to document the damage and contact your insurance company to understand your insurance policy regarding roof damage. This will help you prepare to file a claim if necessary.
Q: How do I file a roof damage insurance claim?
A: To file a roof damage insurance claim, document the damage with photos and a detailed description. Then, contact your insurance company to initiate the claim process and provide the necessary information to file a claim.
Q: What types of roof damage are typically covered under a homeowners insurance policy?
A: Homeowners insurance typically covers roof damage caused by specific events such as hail, wind, and other natural disasters. However, it’s essential to review your policy to understand the types of damage covered.
Q: How long must I file an insurance claim for roof damage?
A: The deadline for filing an insurance claim for roof damage varies by insurance company and policy, but it’s generally advisable to file claims as soon as possible. Check your policy for specific timelines and requirements.
Q: What can I expect during the insurance claim process for roof damage?
A: During the insurance claim process for roof damage, an insurance adjuster will assess the extent of the damage and determine the cost value of your roof. They’ll either approve your claim or explain if it’s denied.
Q: Can I get a second opinion on the damage before filing a claim?
A: You can get a second opinion on the roof damage before filing a claim. This can be helpful to ensure you have a clear understanding of the extent of the damage and the necessary repairs before you file a roof damage insurance claim.
Q: What happens if my insurance company only pays the depreciated value of my roof?
A: If your insurance company only pays the depreciated value of your roof, you may need to cover the difference if you choose to replace your entire roof. Understanding how your homeowner’s insurance policy calculates the depreciated value and what that means for your claim is essential.
Q: What should I include when documenting the damage for my claim?
A: When documenting the damage for your claim, include clear photos, a written description of the signs of storm damage, and any estimates you have received for repairs. This information will support your roof damage insurance claim.
Q: Is filing an insurance claim for minor roof damage necessary?
A: It may not be necessary to file an insurance claim for minor roof damage, especially if the cost of repairs is less than your deductible. However, weighing the long-term implications and consulting with your insurance company regarding the best course of action is essential.

Conclusion: A Smoother Roof Claim Process
Filing a roofing claim after storm damage may seem like a complex and stressful process, but with the right approach, it can go smoothly, especially if you have a licensed roofing company to assist you. By documenting the damage carefully, understanding your policy, and working closely with your adjuster and contractor, you can ensure that your roof gets the repairs it needs— without the possible headaches that can arise.
Hire Denny’s Roofing to guide you through the process.
You will be glad you did.
And remember: storms come and go, but a well-maintained roof is your home’s best line of defense. Regular roof inspections and timely repairs will ensure that your home stays safe, no matter what Mother Nature throws your way.