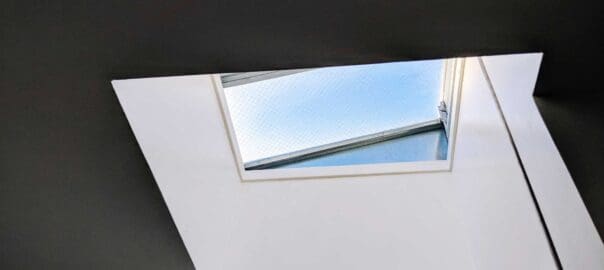
If you’re considering installing a skylight, it’s essential to understand the important connection between skylights and your roof to protect your home from potential problems.
Many homeowners worry that installing a skylight will cause leaks in their roof, but the “all skylights leak” is a actually a myth. The leading cause of leaking skylights is poor installation, leak barrier errors or improper methods used during construction. If you install a skylight incorrectly, it won’t be properly sealed against weather. Poor quality materials can also contribute to problems down the road and a leaking skylight or roof is inevitable.
The best way to ensure that your skylight won’t leak is to install it correctly by a roofing professional experienced with the installation process like Denny’s Roofing. Choosing quality materials, such as the right waterproofing membranes and flashings, is also vital to protecting the roofing system.
Installing a skylight can be a great way to bring natural light into your home and create a beautiful aesthetic. However, installing a skylight also involves working on the roof, and that’s why it’s critical to consider the following things before installing one:
1. Determine the Right Placement
When installing a skylight, think about the direction of sunlight you want.
South-facing skylights bring in the most direct sunlight and are best if you’re looking to maximize natural lighting. East-facing skylights get morning sun and are the brightest during winter when days are shorter. West-facing skylights are great for bringing in the afternoon sunlight and can be used to enjoy the sunset or watch a beautiful sky during the night. North-facing skylights bring in diffused, indirect light throughout the day, which is best for preventing overheating from direct sunlight. When you’re thinking about the room in which you want to add a skylight, clarify your goals for lighting will help you determine the best placement.
2. Consider Your Existing Roofing Materials
When installing a skylight, it’s essential to consider how it will affect your roof.
Skylights are an opening in the roof and should be installed carefully by a professional roofing company to ensure that waterproofing isn’t compromised. Check with your local professional before installing a skylight to ensure it won’t compromise the integrity of your existing roof or cause any other potential damage in the form of future leaks. This is really not a do-it-yourself type of project. Adding extra insulation or ventilation may also be necessary to prevent heat loss.
If your roof is aging and nearing the end of its lifespan, installing a skylight may not be the best idea, as it can cause additional stress to the already weakened roofing system. It will also add weight to your roof, so make sure that it can support the extra weight before installing one. These steps can help protect your home from future damage and ensure the skylight gets installed correctly. When installing a skylight, use quality materials designed to withstand extreme temperatures, wind, snow, ice and of course rain!
3. Prevent Heat Gain by Installing Vents or Shutters
When installing a skylight, prioritize improving air circulation and reducing heat gain.
Installing a skylight is a great way to bring in natural light and ventilation while adding character and beauty to your home. However, installing a skylight can also increase the amount of heat gain into the home through your roofing materials. To help prevent this, installing vents or shutters or even solar shades near the skylight can improve air circulation and reduce heat gain.
This is especially beneficial during summer when temperatures can be high outside. That said, it’s crucial to ensure that installing vents or shutters near a skylight doesn’t damage your roofing material. So, it’s wise to consult a professional company for advice on protecting your roof before installing it. Installing vents or shutters near a skylight allows you to enjoy the benefits of natural light and air circulation without sacrificing energy efficiency!
4. Hire a Professional with Experiencing Installing Skylights
When installing a skylight, hiring a professional roofer often makes the most sense!
Denny’s Roofing is a certified Velux Instalation Specialist and listed on their website.
It’s best to get help from a professional roofer or contractor when installing a skylight, as they will have the right tools and knowledge to install it, ensuring to seal any potential leaks or drafts properly. Not all roofers have extensive experience installing skylights, so ask questions before hiring them such as how many skylights they’ve installed in the past, what type of skylights they’re used to installing, and whether or not they can provide references from customers who have installed skylights with them in the past.
It’s also vital to ensure the roofer is familiar with installing skylights on various roof types and materials, such as metal and tile. This will help protect your roof from any potential damage during the skylight installation process. The difference in the installation of all three is a very different process for each.
Lastly, ask your roofer what steps they will take to ensure the skylight is installed correctly and safely. A professional roofer should be able to answer all of these questions and provide guidance on protecting your roof before installing a skylight.
If you’re considering installing a skylight on your roof, you’ll need to understand the process. We don’t recommend this being a do-it-yourself project. Too many things can go wrong. But if you are set on doing it yourself… Here is the process.
Several methods exist for installing skylights on roofs, including direct nail-down and shingle-over. Direct nail-down involves attaching the skylight directly to your roof with nails, while shingle over requires installing a flashing and asphalt base prior to installing the skylight.
Whether you go with direct nail-down or shingle over, be sure to carefully follow the manufacturer’s installation instructions for your particular product.
Let’s look at the process for installing a skylight:
- Installing a skylight begins by accurately measuring the area on your roof where you plan to install the skylight. This is a crucial step as it will help you determine the type of skylight that’s best for your space and ensure that it fits properly. You’ll need a tape measure, a carpenter’s level, and a chalk line to measure the area accurately. Begin by measuring the opening length in which you plan to install the skylight, making sure to measure from corner to corner so that you accurately measure both the width and length of the opening. Next, use your carpenter’s level or a regular leveler to see if your roof is square or not. You may need to adjust your measurements slightly if it’s not. Once you have the sizes and know that your roof is square, use a chalk line to mark around the perimeter of the opening. This will give you a general idea of where to install the skylight once it arrives.
- The next step is to ensure that the framing and flashing meet local building codes before installing them. Before installing a skylight, you need to know what type of skylights are allowed in your area, what materials are allowed for the skylight frame and flashing, and how to properly install them. Your local building codes will provide specific information about these requirements. You can find the local codes at your city or county website under building codes or a licensed contractor specializing in installing skylights and roofing. When installing the skylight, follow the manufacturer’s instructions and adhere to any additional building code requirements in your area. This will help ensure that it’s correctly installed, sealing out water and protecting your roof from future damage. By doing your research ahead of time and making sure all framing and flashing meet local building codes, installing a skylight can be an easy and rewarding experience. With the proper knowledge and diligence, installing a skylight doesn’t have to be intimidating or overwhelming.
- After that, cut an opening in the roof deck for the skylight frame and flashings, making sure to protect your roof with a cover or tarp during this process. Strengthen the area around the opening by installing a reinforcing plate of galvanized steel, or plywood. This will help support the skylight opening and protect the roof deck from potential damage. Cut out the marked area using an oscillating saw, jigsaw, or circular saw with a fine-toothed blade. Choosing the right type of saw for the job is important – if you use a saw with too coarse of teeth, it could damage your roof deck. Then, install flashing around the opening and attach it securely to the deck with nails or screws.
- Once you cut the opening and the framework is correctly mounted, it’s time to install the skylight. With direct nail-down, you’ll simply attach the skylight directly onto your roof with nails. If installing shingle-over, you’ll need to lay a base of asphalt underalyment that is tied into the existing roof system properly and install the proper flashing before installing the actual skylight. Most skylights have the appropriate flashing kits available when you purchase the skylight.
- Be sure to follow up with some silicone sealant or caulk for extra protection! Once your skylight is installed you must take measures to ensure that it remains properly sealed. This includes installing additional flashing around the edges of your skylight and using sealant to fill any gaps or holes.
What are the most common types of skylights?
Skylights come in various styles, shapes, and sizes.
The three most popular types of skylights are fixed skylights, operable skylights (often referred to as ventilating skylights), and tubular skylights also referred to as “sun tunnels.” Fixed skylights are non-opening windows that provide natural light and a great view. Operable skylights open to provide ventilation and can also be used to bring in natural light. Tubular skylights are compact, dome-shaped skylights that fit between roof rafters and provide bright, efficient lighting in hard to reach places like in the middle of the house.
Skylights and roofing materials should be considered together to ensure they complement each other in style and function! Additionally, look for skylights with energy-efficient features such as double glazing and low-emissivity (Low-E) coating.
Considering these factors, you can choose the perfect skylight for your room or home improvement project. With the right combination of style and construction, installing a skylight can be an attractive and efficient way to bring natural light into your home.
Homeowners should also be aware that installing a skylight requires specific knowledge and expertise. If you’re not familiar with roofing techniques and guidelines, or are not a confident do-it-yourselfer, it’s best to hire a professional to do the work for you!
If you already have skylights installed on your roof, you’ll want to consider how often they need to be replaced to ensure your roof (and your home) stays safe!
But how can you tell when a skylight needs replacing?
First, inspect your skylights for any visible signs of damage, such as cracks in the glass or worn-out frames. If you notice any wear and tear, it may be time to consider installing a new skylight. You’ll also want to pay attention to any leaks that may occur during the rainier and snowier months. Leaks can be a sign of a compromised seal, so addressing these issues is important before they cause more damage.
In addition to inspecting for visible signs of damage, another way to see if your skylight needs replacing is by installing a safe ladder and stepping onto your roof to physically inspect the skylight. If you find that your skylight is cracked or damaged, installing a new one will not only protect your roof from future damage but can also help improve your home’s energy efficiency. If you don’t feel comfortable getting up on your roof, hire a professional to do the inspection.
Finally, it’s important not to neglect regular maintenance of your skylight!
This includes regularly checking for any signs of wear and tear, such as cracks or leaks. And looking at the area just under the skylight to see if there are any moisture stains or cracks in the wood or sheetrock that need to be addressed. Regularly maintaining your skylight will ensure it lasts longer and keeps your roof safe from further damage.
Ultimately, installing and properly maintaining a skylight can benefit your home in the long run.
It’s essential to regularly inspect your skylights for any visible signs of damage or wear and tear, and installing a compatible skylight on your roof can help protect it from further deterioration. With proper maintenance, you’ll ensure that your skylight keeps your home secure and energy-efficient for years to come!


