All posts by Denny's Roofing

Which Roofing System is BEST for My Home in a Hail Prone Area? Shingle – Tile – Metal?

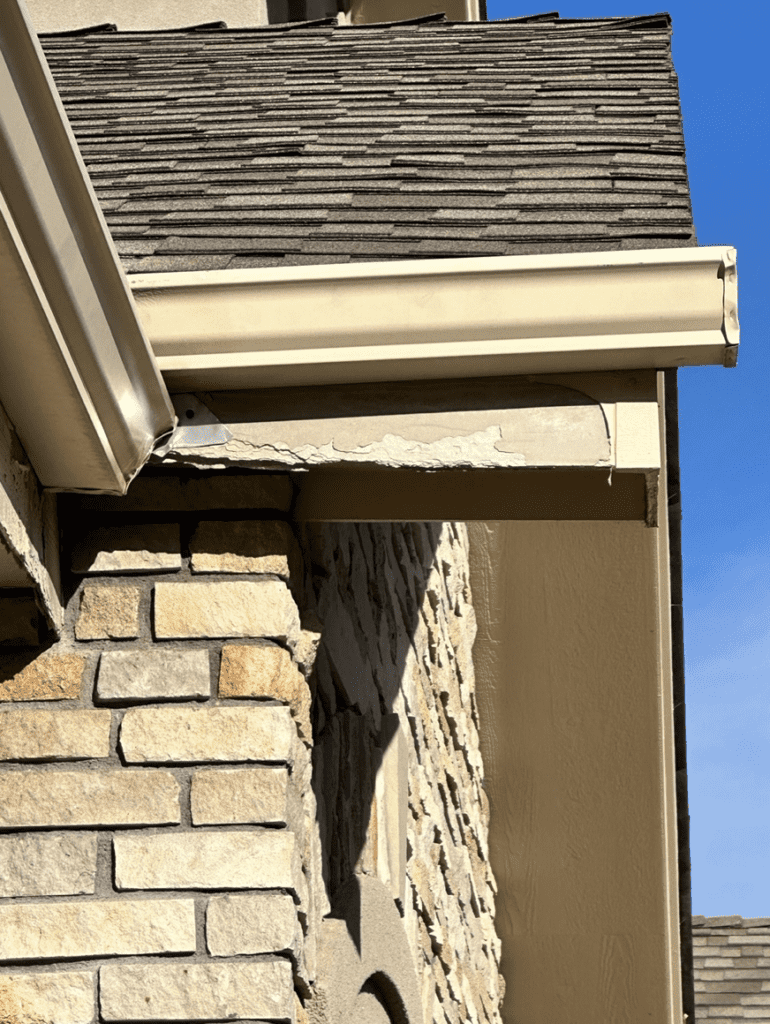
Hailstorms can be one of the most destructive natural phenomena. Especially when it comes to the different materials that your roof can be constructed with. Hail can cause significant damage to homes, buildings, and vehicles, and your roofing system is usually the first line of defense.

Therefore, if you live or work on the Front Range of Colorado, it’s crucial to choose a roofing material that can withstand hail damage and the high winds we have been having recently.

Three popular roofing materials are known for their durability against hail damage:

Architectural shingles, Concrete tile, and Metal roofing systems.

In this article, we will compare the pros and cons of each material to determine which one is better at resisting hail damage.

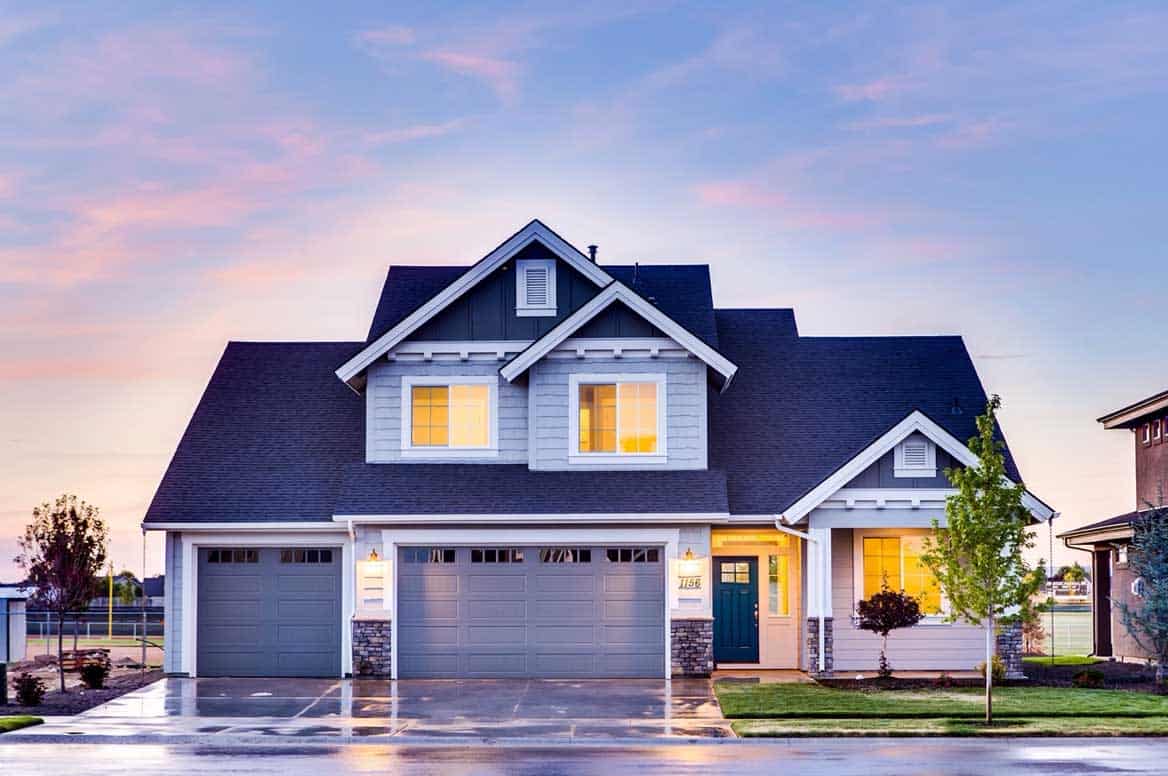
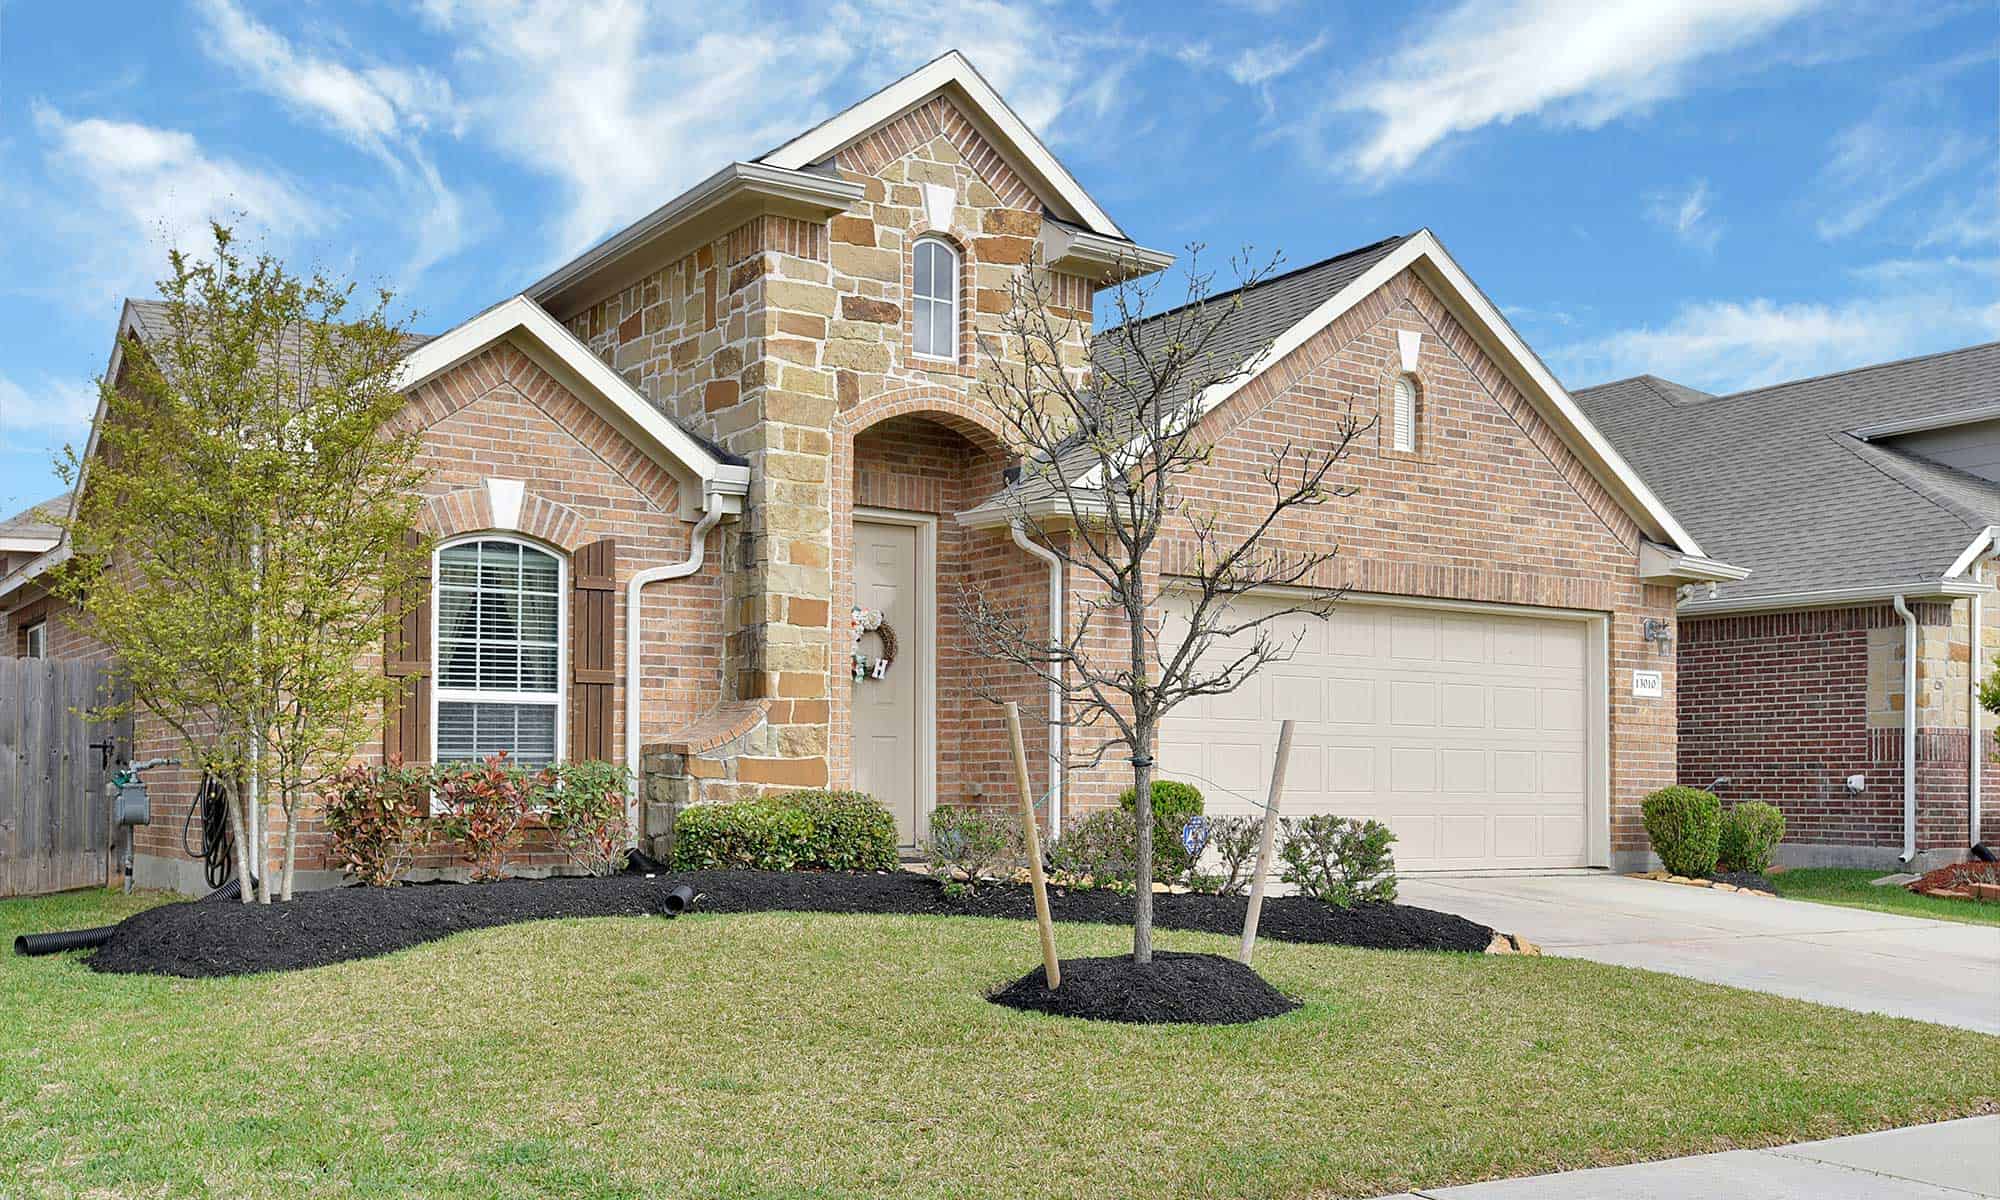
Architectural Shingles

Architectural shingles, also known as dimensional shingles, are composed of asphalt and fiberglass layers. These shingles are thicker and more durable than traditional three-tab shingles, making them better at resisting hail damage. There is a shingle known as a Class 4 IR (impact resistant) shingle that is replacing most homes for shingle roofs these days. The technology of some of the shingle manufacturers is getting better and better all the time.

  • Cost Perspective: Architectural shingles are the most affordable option of the three roofing materials. The cost per square foot is relatively low, making it an attractive option for homeowners on a budget.
  • Effect on Home Resale Value: Although not the most high-end option, architectural shingles have a broad appeal, making them a good choice for resale value. Additionally, they come in a variety of colors and textures, allowing homeowners to customize their roof to match their home’s aesthetic.
  • Longevity: Architectural shingles typically have a lifespan of 20-30 years. However, their longevity can be affected by the severity of weather conditions in the area. In areas with frequent hailstorms, homeowners may need to replace their shingles more frequently. The average lifespan if not damaged by a storm is around 15 to 25 years here on the Front Range.

Pros:

  • Most affordable option among the three
  • Wide variety of colors and textures to choose from
  • Relatively easy to install
  • Can be a good option for homes with a steep roof pitch

Cons:

  • Lifespan of 15-25 years is shorter than concrete tile or metal roofing systems
  • Not as durable as concrete tile or metal roofing systems
  • Not as energy efficient as metal roofing systems

NOTE: Ask your Roofing Contractor for a Class 4 IR Shingle the next time you are replacing your shingled roof.

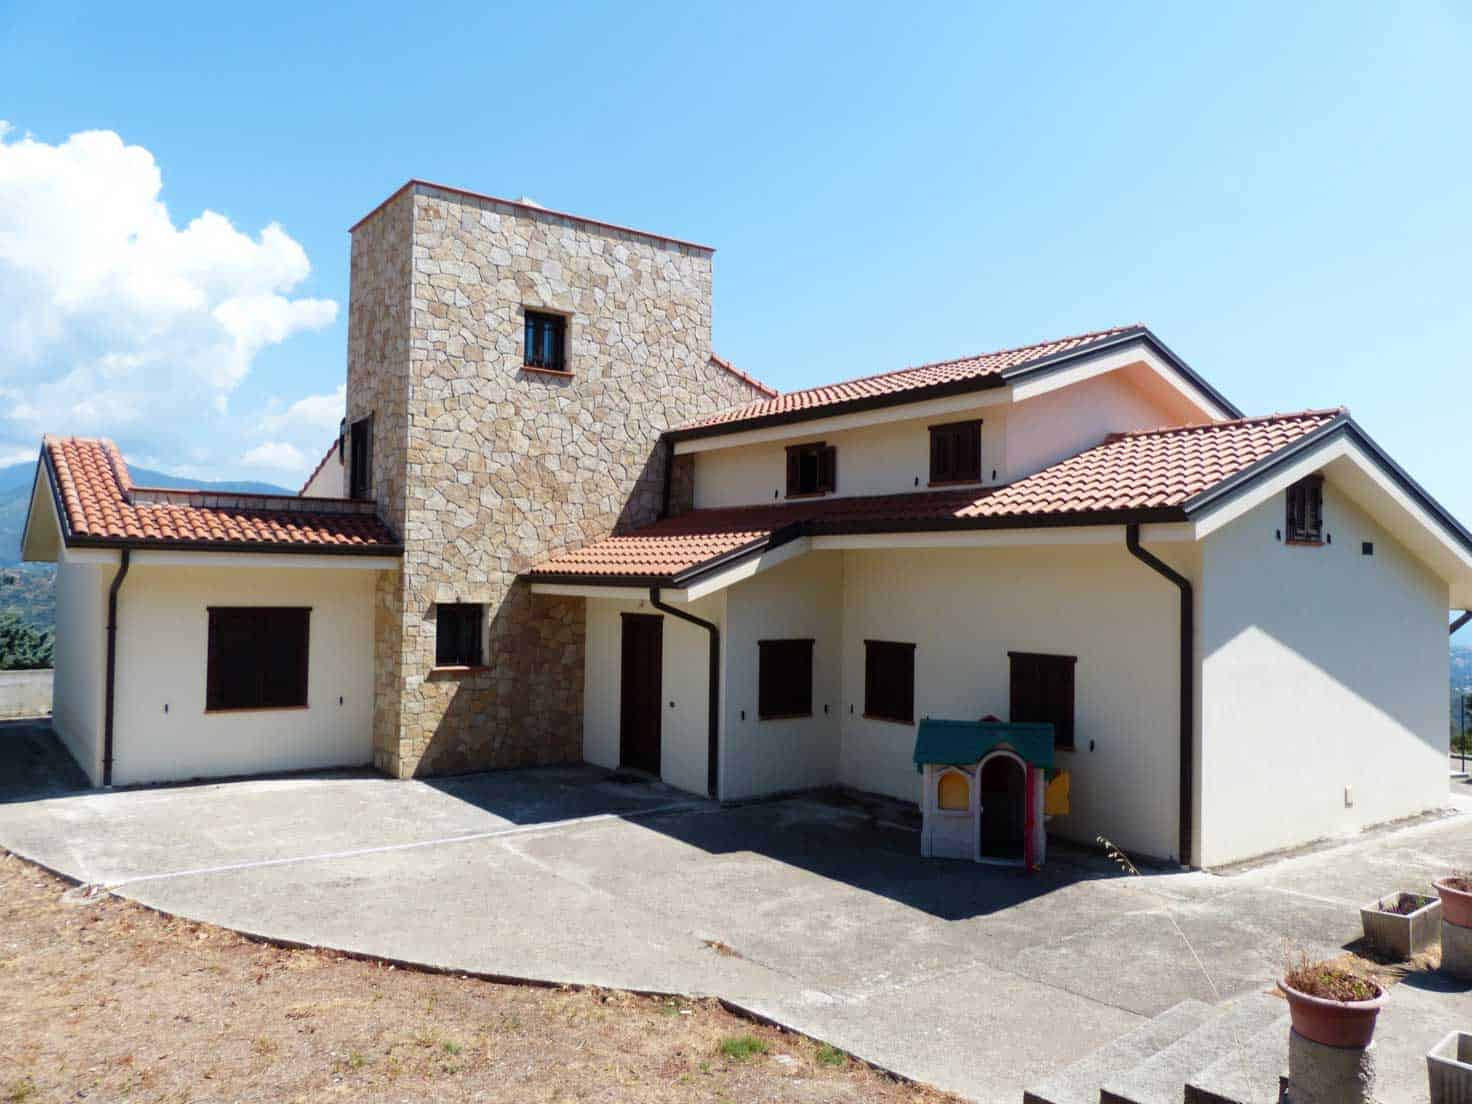
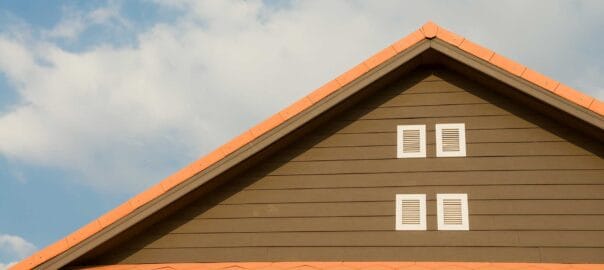
Concrete or Clay Tile

Concrete/Clay tile roofing systems are made of a mixture of sand, cement, and water. The tiles come in a variety of shapes, colors, and textures, making them an attractive option for homeowners looking for a unique and stylish roof.

  • Cost Perspective: Tiles are more expensive than architectural shingles, making them a less attractive option for homeowners on a budget. However, they can last significantly longer than shingles, potentially making them a more cost-effective option in the long run.
  • Effect on Home Resale Value: Tile roofs have a high-end look and can add value to a home. They have a unique aesthetic that can be a selling point for potential buyers.
  • Longevity: Tile roofs can last up to 50 years or more, making them one of the longest-lasting roofing materials. They are also more resistant to hail damage than architectural shingles, making them an excellent option for homeowners in areas prone to severe weather.

Pros:

  • Highly durable and can withstand extreme weather conditions, including hailstorms
  • Long lifespan of 50 years or more
  • Variety of colors and shapes available to create a unique and stylish look
  • Fire-resistant and energy-efficient

Cons:

  • More expensive than architectural shingles
  • Heavy, so the roof structure may need to be reinforced
  • Requires professional installation, which can be costly
  • More difficult to repair than other roofing materials

Note on Tile Roofing systems: Tiles can and do crack which can cause issues with water damage. Tile manufacturing company will discontinue them over time which will make it hard to get replacement tiles in the future. Make sure that once your roof is finished, you have about 20-25 regular tiles and 15-20 ridge tiles in storage. If you don’t, your long-lasting roof might just become obsolete because there are no tiles to match it.

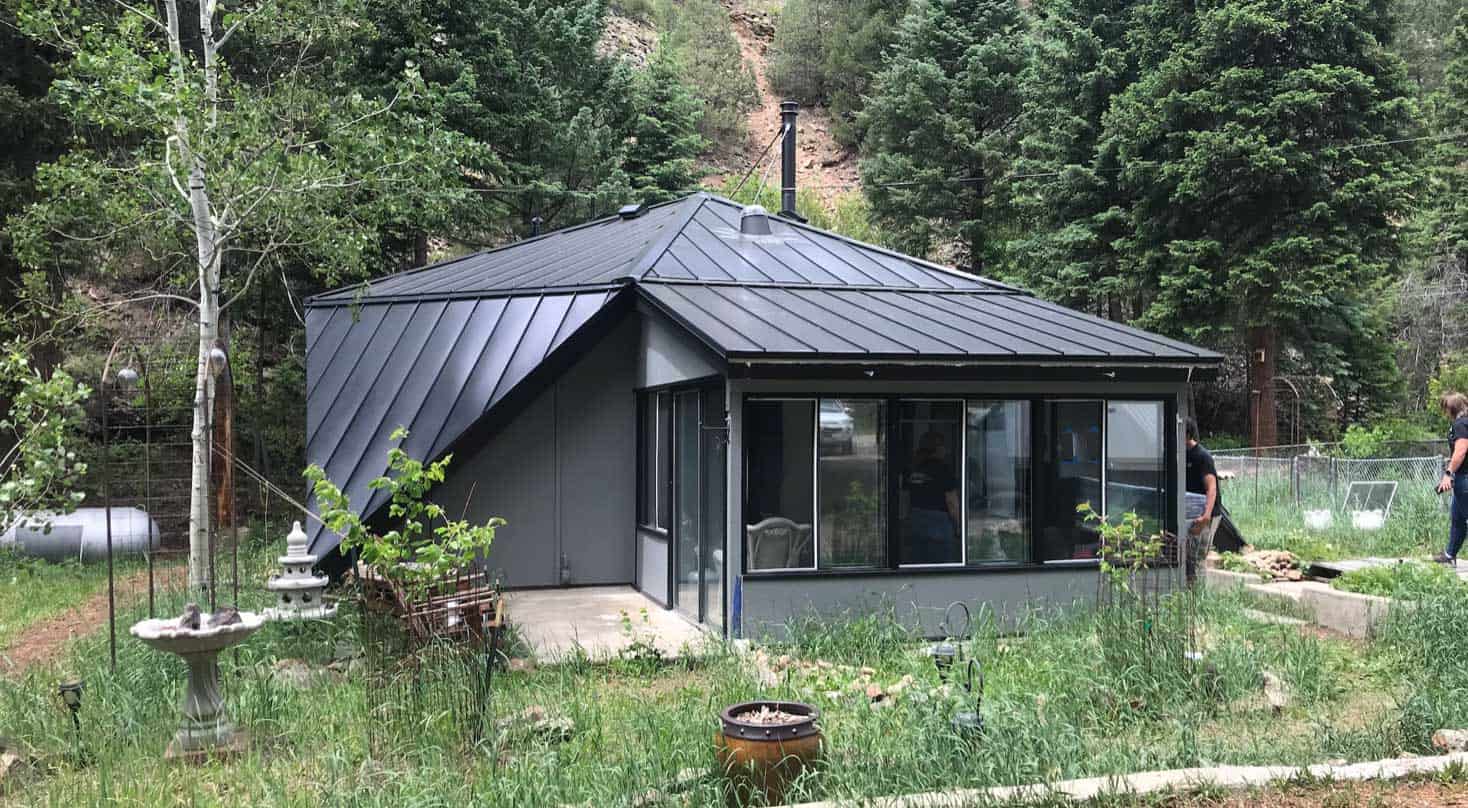
Metal Roofing Systems

Metal roofing systems are becoming increasingly popular among homeowners due to their durability and energy efficiency. They come in a variety of materials, including aluminum, steel, and copper.

  • Cost Perspective: Metal roofing systems are the most expensive option of the three materials. However, they are incredibly durable and require minimal maintenance, potentially making them a cost-effective option in the long run.
  • Effect on Home Resale Value: Metal roofs have a modern and sleek look that can add value to a home. They are also an eco-friendly option, which is becoming increasingly important to potential buyers. There are different levels of metal roofing systems. A copper roof looks wonderful and is extremely expensive. Standing Seam is a wonderful architectural choice too.
  • Longevity: Metal roofs can last up to 50 years or more, making them an excellent long-term investment. They are also highly resistant to hail damage, making them an attractive option for homeowners in areas prone to severe weather. NOTE: They do dent in a large hail storm. Make sure you have the proper replacement coverage on your roof if there is big hail.

Pros:

  • Extremely durable and can last up to 50 years or more
  • Highly resistant to hail damage and other extreme weather conditions
  • Energy-efficient and can help reduce heating and cooling costs
  • Low maintenance and easy to clean

Cons:

  • Most expensive option among the three
  • Can be noisy during heavy rain or hail
  • Requires professional installation, which can be costly
  • Limited color options compared to other roofing materials

Conclusion

Overall, each roofing material has its own set of advantages and disadvantages.

Homeowners should consider their budget, aesthetic preferences, and the climate of their area before making a solid informed decision.

  • Architectural shingles are the most affordable option, but may not be as durable as concrete tile or metal roofing systems.
  • Concrete tile is highly durable and long-lasting, but can be more expensive and require professional installation.
  • Metal roofing systems are extremely durable and energy-efficient, but are the most expensive option and have limited color options.

It’s your choice and in the end… whatever you choose will look beautiful on your home.

How long should the Shingles on my Roof last on the Front Range of Colorado?

Because of all the wind storms and hail storms that we have here locally, shingle roofs can take a beating. Here are some tips that will help you get more years out of the shingles up on your roof.

Asphalt architectural shingles are the most popular and affordable roofing option for homeowners in Colorado. They offer an attractive and durable roofing solution that can withstand the harsh weather conditions that are common in the Front Range. However, many homeowners wonder just how long an architectural shingle roof will last on the Front Range, given the frequent wind and hail storms.

The lifespan of an architectural shingle roof depends on a variety of factors, including the quality and brand of the shingles, the installation expertise, and the overall climate over the years the shingles are up on the roof. On average, an architectural shingle roof can last anywhere from 15 to 25 years, but this lifespan can vary depending on the specific conditions of the Front Range.

One of the primary concerns for homeowners in Colorado is the frequent wind and hail storms.

Wind can cause damage to shingles by ripping them or lifting them up and breaking the seal that holds them in place. Hail, on the other hand, can cause dents and cracks in shingles, which can lead to leaks and other types of damage as your roof ages.

To combat these issues, many manufacturers have developed shingles specifically designed to withstand high winds and hail. These shingles are often referred to as Class 3 and Class 4 IR (impact-resistant) shingles and are rated by their ability to withstand impact from hailstones of various sizes and hardness. Homeowners in the Front Range may want to consider using these types of shingles to help protect their roof from damage. Unless a client requests a shingle other than a Class 4 or Class 3 shingle, we always recommend putting them on when a roof is being redone.

In addition to using impact-resistant shingles, homeowners can also take other steps to protect their roofs from wind and hail damage.

One important step is to ensure that the shingles are installed properly.

Shingles that are not properly installed or even were installed when it was too cold or in extreme weather conditions can be more susceptible to damage from wind and hail. Homeowners should work with a reputable roofing contractor who has experience installing architectural shingles up and down the Front Range.

Another important factor to consider is the climate on the Front Range.

Colorado has a semi-arid climate with hot summers and cold winters. This can cause significant temperature fluctuations, which can lead to the expansion and contraction of shingles. Over time, this can cause the shingles to crack and deteriorate. Especially if they have any previous damage. The slightest bit of damage can turn into an issue as they age and go through their expansion and contraction cycles.

To combat this issue, homeowners should choose shingles that are designed to withstand extreme temperatures. Many manufacturers offer shingles that are specifically designed for use in hot and cold climates. These shingles are often made from materials that can expand and contract without cracking or deteriorating. This is a newer shingle technology. Speak to your local Roofing expert for a recommendation.

Finally, it’s important for homeowners to maintain their roofs properly to ensure they last as long as possible.

Regular inspections and maintenance can help identify and address issues before they become more serious. Homeowners should also ensure that their gutters are clean and free from debris, as clogged gutters can cause water to back up under the shingles, leading to leaks and other types of damage.

Ensuring the longevity of your architectural shingle roof on the Front Range of Colorado requires some effort and attention.

Here are the 7 best things that homeowners can do to ensure that their roof has as long a lifespan as possible:

  1. Regular Inspections: Regular inspections every few years can be crucial to detect any damage, leaks or other issues. A professional inspection every 3 to 5 years is highly recommended to identify any issues before they become bigger and more expensive to fix. A good Roofing Contractor can spot a potential issue before it becomes a major issue.
  2. Clean Gutters: Clean gutters are very important for the health of your roof. Clogged gutters can cause water to back up, which can lead to leaks and ice damming and other types of damage if they are not maintained regularly. It is recommended to clean the gutters at least twice a year, especially in the fall after the leaves have fallen.
  3. Trim Trees: Overhanging branches can damage your roof, especially during high winds and storms. Trim any trees that are too close to your roof to avoid the risk of damage.
  4. Proper Ventilation: Proper ventilation is important to maintain the integrity of the shingle. Poor ventilation can cause unseen moisture buildup, which can lead to the growth of mold and mildew. We think of Colorado as having low humidity, but mold can still happen. Improper ventilation can also cause shingles to curl, harden and deteriorate faster. Make sure that your attic has proper ventilation to avoid these issues.
  5. Use High-Quality Materials: The quality of the shingles and other materials used during installation can greatly impact the lifespan of your roof. Always choose high-quality materials to ensure durability and longevity. We here at Denny’s Roofing NEVER skimp when it comes to the quality of the materials that we use when installing a new roof. It is just not worth the savings of a few bucks when the integrity of your Roof is at stake. The risk as your roof ages is just not worth it.
  6. Repair Storm Damage Promptly: If any damage is detected during inspection, it is important to repair it as soon as possible. Delaying repairs can lead to bigger and more expensive issues in the future. It’s also important to check on the areas of possible penetration on a roof when inspecting too. Reapplying caulking to seams and exposed nail heads can help ensure the integrity of your roof.
  7. Hire a Professional Contractor: A reputable roofing contractor with experience in installing and maintaining architectural shingle roofs in the Front Range can ensure that your roof is installed correctly and maintained properly. Work with a professional contractor like Denny’s Roofing to ensure that your roof is in good hands.

In summary, regular inspections, clean gutters, trimmed trees, proper ventilation, use of high-quality materials, prompt repairs, and working with a professional roofing contractor are some of the best things that homeowners can do to ensure that their architectural shingle roof lasts 15 to 25 years. With the proper care and attention, your roof can withstand the harsh weather conditions of the Front Range of Colorado and provide you with peace of mind for years to come.

13 Reasons to Fix or Replace your Gutters

When a well-designed and well-maintained gutter system is installed on a home or business, it should last for decades if they are not damaged in a storm, ice damming or in high winds. That said, there will come a time when even the best maintained gutters will need to be replaced because they have “aged-out” and have reached their life expectancy.

This article will give you a heads up on what to look for when an “out of the norm” situation occurs to your gutters so that you can take care of it as soon as you notice it – so that additional damage does not happen. One of the joys of being a “homeowner.”

Here are 13 reasons you might need to fix or replace your gutter system.

1) CLOGGED/BLOCKED GUTTERS – When gutters are catching the rain and snow as it comes off your roof, that means it is also catching EVERYTHING else that has fallen up on the roof. And it will ALL end-up in the gutters. Organic matter such as leaves, pine needles, twigs, branches, aggregate and dirt coming off your roof, or even blowing trash can build up over time or even just a season if you don’t keep them clear and clean. And rotting organic material can form a thick sludge that will clog gutters and have them overflowing quickly if there is no maintenance performed on them. You can put on a “gutter guard” that will keep most of the leaves and twigs from ending up in the gutters. And honestly, you have to be careful with “gutter guards” because when winter rolls around, gutter guards can possibly lead to ice damming and icicles forming and falling off the gutters, which can be a hazard. So, if you have gutter guards put on, be careful and be aware.

Gutters are in need of a good cleaning!

2) GUTTER/DOWNSPOUT LEAKS – When gutters are installed, the installer may have missed sealing a joint or a downspout hole with what we call “gutter cement.” It’s meant to seal the gutters so that you don’t have any leaks. Leaking can get behind the fascia and soffits and cause additional damage if not corrected.

3) BACK-FLOWS – Clogged gutters can also lead to overflowing or “back-flowing” gutters which can pour over the edge and defeat the purpose of having gutters. And in the winter months, those leaks can also lead to ice on the pavement which can be a huge hazard. Full gutters from clogs or having them hung improperly can also lead to ice forming in the gutters when it’s cold. That ice can expand and cause issues like pushing the gutters away from the fascia. Ice damming can form up under the shingles and cause damaging leaks. Also, convergence points of where corners meet and the system gets complicated can also be a point of issues. Have a professional look at them.

There is a lot going on in this picture of a gutter we recently looked at.

4) POORLY SLOPED GUTTERS – When gutters are installed correctly, they should have a slight slope towards the downspout drains so that when it rains, they drain properly and don’t have standing water in them after a precipitation event. If they are not sloped correctly, water will pool and when mixed with leaves, dirt and normal granule loss from your shingles, it can eventually create a blocked gutter. Not to mention that during a storm, they will not be draining properly. And standing water can pool and damage gutters over time. I’m not sure that most people realize that their gutters have a slight slope. I’ve had clients tell me that their gutters are crooked. If you are not aware of how they are hung, If you go to the front of your home, and look at them you should be able to see it. If they are not sloped, or sloped properly it will become a problem over time.

5) SAGGING GUTTERS – Gutters have traditionally been attached to your fascia and trussing beams by long and large nails that were hammered into the end of the trussing beams. Now gutters are attached with “hangers” that are placed along the gutter and screwed into the fascia to hold the weight of the gutter and the contents during a weather event. When its wintertime, and a tremendous amount of snow and water that fills your gutters, maybe there is an abundance of organic material and granule clogged in the gutters or they were not installed with enough hangers, the extra weight can cause them to sag and they can even buckle. The weight just overwhelms the existing hangers and they can fail.

The perfect example of neglected and “sagging” gutters.

6) DAMAGED GUTTERS – Gutters can be damaged for a number of reasons. They can be dented, become cracked, bent out of their original shape, they can be sagging, clogged or blocked and most likely have the seams fail and leak. Even seamless gutters have a few seams. They are limited, but they are there. All of these can cause water to pool or organic material to clog and create extra weight in the gutters. Eventually, when a ladder gets placed against them to get up on that section of your roof, they can come off their hangers and even collapse. Hopefully you as the homeowner or a professional is doing the necessary maintenance so that this does not occur. Gutters falling off your home can bring a whole slew of additional issues that you just don’t need.

7) IMPROPERLY BUILT DOWNSPOUTS – If your downspouts are built correctly, everything should be fine. There should be enough drainage around the house from the gutters and drainage should not be an issue. Sometimes downspouts need to be placed in areas where the water should be aimed at a drain when emptying on concrete or should be channeled away from the foundation of a house with an extension or “kick-out.” Downspouts can also be missing the sealant or “gutter cement” that seals around the opening at the gutter. If you are having issues with them leaking or getting clogged, have a professional look at them.

8) ICE DAMMING – When there is too much snow on top of your roof, and warm and cold days and nights, your gutters can be overwhelmed with ice damming. The snow will thaw and freeze and thaw and freeze. It will start to create hanging ice cycles and freezing up on the roof, especially at the gutter line. This can be an issue if not addressed. The ice/snow can form and push up under shingles even pulling nails up and working moisture up under the underlayment on the roof, which can cause an internal leak. Most of the time, “heat cable” placed in the gutters or zig-zagged near the eve of the roof can prevent this kind of build-up of ice. But not always. Sometimes it requires manual effort to pull the snow off the edge of the roof with a snow rake to lessen the snow load. This can be dangerous, so if you are not comfortable on a ladder, get a professional to help.

9) INCORRECT SIZED GUTTERS or DOWNSPOUTS – 5” seamless gutters and 2” by 3” downspouts are the norm when it comes to the standard size. Depending on the size of the roof and the amount of water coming off each slope, you may need to upgrade to 6” gutters and 3” by 4” downspouts. Larger roofs with multiple combining of slopes can create too much water trying to drain out of too little drainage and cause problems.

10) TOO LITTLE DRAINAGE FROM DOWNSPOUTS – Gutters are installed on the eves of the home. (The edge of the roof at the end of a slope.) Where downspouts are placed can be a challenge in certain situations because of needing to drain away from walkways, basement window wells, home foundations and more. Sometimes gutter systems are designed with too little drainage to handle the amount of rain. Here on the Front Range, we seldom see that kind of precipitation, and it can, and does occur. So, most systems are designed and built for the norm. The lack of adequate drainage can cause water to get behind the gutters and cause issues with leaks inside the home along with long term issues with fascia and soffits if they are not addressed. Call out a professional to help come up with the proper solution to inadequate drainage.

11) OLD GUTTERS – Here on the Front Range, with regular hail storms, gutters are most likely replaced from time to time but sometimes they can just age and outlast their lifespan and need to be replaced before they cause a bigger issue. We do see gutters just needing to be replaced for the reasons listed in this article above.

Older damaged gutters from a fallen tree branch.

12) ROTTING FASCIA or SOFFITS MEANS… – When you see a rotting section of your Fascia or Soffit or you see the paint peeling on sections of them, you have water that is leaking or overflowing out of your gutters. This is a sign to deal with the issue immediately before it worsens.

Extreme water damage on fascia and soffits from poorly installed gutters.

13) CHANNELING WATER FLOW ON THE ROOF – Sometimes a piece of special “flashing” is needed to properly channel waterflow in and on certain sections of your roof. The roofers attempt to take care of this during the roof installation. And certain flashing is code. And depending on the design of the roof, more might be needed. This usually can only be recognized during a storm and extreme situation to show need. If you see water pouring out of your gutters at a corner or over the edge of the gutter, take video during the event and show it to a professional.

With ANY leak or overflow situation, take pictures and preferably video to show your local Roofing/Gutter professional the actual situation that you are calling them about. It would be very helpful at pinpointing the proper solution and speed up the repair process.

Let us know if we can be of any help in supporting you in fixing your situation.

Top Things to Consider When Thinking About Installing a Skylight

If you’re considering installing a skylight, it’s essential to understand the important connection between skylights and your roof to protect your home from potential problems.

Many homeowners worry that installing a skylight will cause leaks in their roof, but the “all skylights leak” is a actually a myth. The leading cause of leaking skylights is poor installation, leak barrier errors or improper methods used during construction. If you install a skylight incorrectly, it won’t be properly sealed against weather. Poor quality materials can also contribute to problems down the road and a leaking skylight or roof is inevitable.

The best way to ensure that your skylight won’t leak is to install it correctly by a roofing professional experienced with the installation process like Denny’s Roofing. Choosing quality materials, such as the right waterproofing membranes and flashings, is also vital to protecting the roofing system.

Installing a skylight can be a great way to bring natural light into your home and create a beautiful aesthetic. However, installing a skylight also involves working on the roof, and that’s why it’s critical to consider the following things before installing one: 

1. Determine the Right Placement

When installing a skylight, think about the direction of sunlight you want. 

South-facing skylights bring in the most direct sunlight and are best if you’re looking to maximize natural lighting. East-facing skylights get morning sun and are the brightest during winter when days are shorter. West-facing skylights are great for bringing in the afternoon sunlight and can be used to enjoy the sunset or watch a beautiful sky during the night. North-facing skylights bring in diffused, indirect light throughout the day, which is best for preventing overheating from direct sunlight. When you’re thinking about the room in which you want to add a skylight, clarify your goals for lighting will help you determine the best placement.

2. Consider Your Existing Roofing Materials 

When installing a skylight, it’s essential to consider how it will affect your roof. 

Skylights are an opening in the roof and should be installed carefully by a professional roofing company to ensure that waterproofing isn’t compromised. Check with your local professional before installing a skylight to ensure it won’t compromise the integrity of your existing roof or cause any other potential damage in the form of future leaks. This is really not a do-it-yourself type of project. Adding extra insulation or ventilation may also be necessary to prevent heat loss.

If your roof is aging and nearing the end of its lifespan, installing a skylight may not be the best idea, as it can cause additional stress to the already weakened roofing system. It will also add weight to your roof, so make sure that it can support the extra weight before installing one. These steps can help protect your home from future damage and ensure the skylight gets installed correctly. When installing a skylight, use quality materials designed to withstand extreme temperatures, wind, snow, ice and of course rain!

3. Prevent Heat Gain by Installing Vents or Shutters

When installing a skylight, prioritize improving air circulation and reducing heat gain.

Installing a skylight is a great way to bring in natural light and ventilation while adding character and beauty to your home. However, installing a skylight can also increase the amount of heat gain into the home through your roofing materials. To help prevent this, installing vents or shutters or even solar shades near the skylight can improve air circulation and reduce heat gain. 

This is especially beneficial during summer when temperatures can be high outside. That said, it’s crucial to ensure that installing vents or shutters near a skylight doesn’t damage your roofing material. So, it’s wise to consult a professional company for advice on protecting your roof before installing it. Installing vents or shutters near a skylight allows you to enjoy the benefits of natural light and air circulation without sacrificing energy efficiency!

4. Hire a Professional with Experiencing Installing Skylights

When installing a skylight, hiring a professional roofer often makes the most sense!

Denny’s Roofing is a certified Velux Instalation Specialist and listed on their website. 

It’s best to get help from a professional roofer or contractor when installing a skylight, as they will have the right tools and knowledge to install it, ensuring to seal any potential leaks or drafts properly. Not all roofers have extensive experience installing skylights, so ask questions before hiring them such as how many skylights they’ve installed in the past, what type of skylights they’re used to installing, and whether or not they can provide references from customers who have installed skylights with them in the past.

It’s also vital to ensure the roofer is familiar with installing skylights on various roof types and materials, such as metal and tile. This will help protect your roof from any potential damage during the skylight installation process. The difference in the installation of all three is a very different process for each.  

Lastly, ask your roofer what steps they will take to ensure the skylight is installed correctly and safely. A professional roofer should be able to answer all of these questions and provide guidance on protecting your roof before installing a skylight.

If you’re considering installing a skylight on your roof, you’ll need to understand the process. We don’t recommend this being a do-it-yourself project. Too many things can go wrong. But if you are set on doing it yourself… Here is the process.

Several methods exist for installing skylights on roofs, including direct nail-down and shingle-over. Direct nail-down involves attaching the skylight directly to your roof with nails, while shingle over requires installing a flashing and asphalt base prior to installing the skylight. 

Whether you go with direct nail-down or shingle over, be sure to carefully follow the manufacturer’s installation instructions for your particular product.

Let’s look at the process for installing a skylight:

  1. Installing a skylight begins by accurately measuring the area on your roof where you plan to install the skylight. This is a crucial step as it will help you determine the type of skylight that’s best for your space and ensure that it fits properly. You’ll need a tape measure, a carpenter’s level, and a chalk line to measure the area accurately. Begin by measuring the opening length in which you plan to install the skylight, making sure to measure from corner to corner so that you accurately measure both the width and length of the opening. Next, use your carpenter’s level or a regular leveler to see if your roof is square or not. You may need to adjust your measurements slightly if it’s not. Once you have the sizes and know that your roof is square, use a chalk line to mark around the perimeter of the opening. This will give you a general idea of where to install the skylight once it arrives.
  2. The next step is to ensure that the framing and flashing meet local building codes before installing them. Before installing a skylight, you need to know what type of skylights are allowed in your area, what materials are allowed for the skylight frame and flashing, and how to properly install them. Your local building codes will provide specific information about these requirements. You can find the local codes at your city or county website under building codes or a licensed contractor specializing in installing skylights and roofing. When installing the skylight, follow the manufacturer’s instructions and adhere to any additional building code requirements in your area. This will help ensure that it’s correctly installed, sealing out water and protecting your roof from future damage. By doing your research ahead of time and making sure all framing and flashing meet local building codes, installing a skylight can be an easy and rewarding experience. With the proper knowledge and diligence, installing a skylight doesn’t have to be intimidating or overwhelming.
  3. After that, cut an opening in the roof deck for the skylight frame and flashings, making sure to protect your roof with a cover or tarp during this process. Strengthen the area around the opening by installing a reinforcing plate of galvanized steel, or plywood. This will help support the skylight opening and protect the roof deck from potential damage. Cut out the marked area using an oscillating saw, jigsaw, or circular saw with a fine-toothed blade. Choosing the right type of saw for the job is important – if you use a saw with too coarse of teeth, it could damage your roof deck. Then, install flashing around the opening and attach it securely to the deck with nails or screws.
  4. Once you cut the opening and the framework is correctly mounted, it’s time to install the skylight. With direct nail-down, you’ll simply attach the skylight directly onto your roof with nails. If installing shingle-over, you’ll need to lay a base of asphalt underalyment that is tied into the existing roof system properly and install the proper flashing before installing the actual skylight. Most skylights have the appropriate flashing kits available when you purchase the skylight.
  5. Be sure to follow up with some silicone sealant or caulk for extra protection! Once your skylight is installed you must take measures to ensure that it remains properly sealed. This includes installing additional flashing around the edges of your skylight and using sealant to fill any gaps or holes.

What are the most common types of skylights?

Skylights come in various styles, shapes, and sizes. 

The three most popular types of skylights are fixed skylights, operable skylights (often referred to as ventilating skylights), and tubular skylights also referred to as “sun tunnels.”  Fixed skylights are non-opening windows that provide natural light and a great view. Operable skylights open to provide ventilation and can also be used to bring in natural light. Tubular skylights are compact, dome-shaped skylights that fit between roof rafters and provide bright, efficient lighting in hard to reach places like in the middle of the house.

Skylights and roofing materials should be considered together to ensure they complement each other in style and function! Additionally, look for skylights with energy-efficient features such as double glazing and low-emissivity (Low-E) coating.

Considering these factors, you can choose the perfect skylight for your room or home improvement project. With the right combination of style and construction, installing a skylight can be an attractive and efficient way to bring natural light into your home.

Homeowners should also be aware that installing a skylight requires specific knowledge and expertise. If you’re not familiar with roofing techniques and guidelines, or are not a confident do-it-yourselfer, it’s best to hire a professional to do the work for you

If you already have skylights installed on your roof, you’ll want to consider how often they need to be replaced to ensure your roof (and your home) stays safe!

But how can you tell when a skylight needs replacing? 

First, inspect your skylights for any visible signs of damage, such as cracks in the glass or worn-out frames. If you notice any wear and tear, it may be time to consider installing a new skylight. You’ll also want to pay attention to any leaks that may occur during the rainier and snowier months. Leaks can be a sign of a compromised seal, so addressing these issues is important before they cause more damage. 

In addition to inspecting for visible signs of damage, another way to see if your skylight needs replacing is by installing a safe ladder and stepping onto your roof to physically inspect the skylight. If you find that your skylight is cracked or damaged, installing a new one will not only protect your roof from future damage but can also help improve your home’s energy efficiency. If you don’t feel comfortable getting up on your roof, hire a professional to do the inspection.

Finally, it’s important not to neglect regular maintenance of your skylight! 

This includes regularly checking for any signs of wear and tear, such as cracks or leaks. And looking at the area just under the skylight to see if there are any moisture stains or cracks in the wood or sheetrock that need to be addressed. Regularly maintaining your skylight will ensure it lasts longer and keeps your roof safe from further damage. 

Ultimately, installing and properly maintaining a skylight can benefit your home in the long run. 

It’s essential to regularly inspect your skylights for any visible signs of damage or wear and tear, and installing a compatible skylight on your roof can help protect it from further deterioration. With proper maintenance, you’ll ensure that your skylight keeps your home secure and energy-efficient for years to come! 

Is Replacing Your Roof Before Selling Your House Worth It?

When you’re preparing to sell your home, there are plenty of decisions to make. One of the most important is whether or not you should replace your roof before listing it on the market.

It can be tempting to put off a major repair like replacing your roof until after you’ve sold your house. After all, it’s expensive and time-consuming. But if you want to get the best possible price for your property, it’s often worth investing in a roof replacement before you list.

If you haven’t had your roof inspected lately, now’s the time to do so whether you’re getting ready to list or just exploring your options for selling in the near future.

A roof inspection can tell you if your roof is in good condition or if it needs to be replaced. Its wise to get a roofer of your choice to look at it before the buyers home inspector looks at it so you know what shape the roof is in. If the inspector finds any major problems, such as structural damage to flashing missing shingles, or hail damage, you’ll need to have them fixed or replace the roof before putting your home on the market.

Here are some reasons why it’s worth investing in a roof replacement if its needed before selling your home:

  • Replacing a roof can help you avoid any hassles during the sale process. Buyers who are interested in your home will likely get an inspection of their own, and if they find a damaged roof, it may give them an opportunity to renegotiate the price of your house or even walk away from the deal altogether. A roof in good condition gives potential buyers peace of mind and reassurance that they won’t need to worry about any costly repairs or replacements once they have purchased the property.
  • Investing in a roof replacement before selling is also financially sound, as it increases the value of your home. This makes your home more desirable to buyers, and can lead to a higher sale price in the end. Overall, replacing or repairing your roof before selling your home is an excellent way to ensure that you move through the process without any hassles, and with the best chance of getting the most value for your property. Especially if its a high quality Class 4 Impact Resistant shingle. A lot of insurance companies will give a 25% discount when you have a Class 4 IR shingle installed. It’s a great selling point. Talk to your Realtor about it if you are interested.
  • A new roof can help attract more buyers and make your house stand out from the competition. Buyers are often willing to pay more for a home with a brand new roof that won’t need any repairs or replacements in the near future.

How much will a roof replacement cost?

Deciding whether to replace your roof before selling your home can be a difficult decision. There are several factors to consider when making this decision, including the cost of the replacement, the potential benefits of replacing the roof, and how long you plan on staying in your home.

Cost is obviously an important factor to take into account when deciding whether to replace your roof. The cost of a roof replacement will depend on the size of your home, materials used, and local labor rates. Additionally, if repairs are needed before the full replacement can be done, then that may add to the overall cost as well.

The benefits of replacing your roof before selling should also be weighed against the cost. As shared above, replacing your roof can lead to a higher sale price for your home, as buyers will be more likely to purchase a home with a newly installed roof. Additionally, replacing your roof may help reduce energy costs in the long run, as newer roofs are often much more energy efficient than older ones, which will be attractive to potential buyers.

Lastly, you should consider how long you plan on living in your home before selling to decide whether to replace the roof. If you’re planning on staying in your home for a while, then replacing your roof may be worth the cost and effort. On the other hand, if you are only planning on selling soon, then it might make more sense to do repairs instead of a full replacement unless there would be enough damage that a potential buyer won’t want your home because of the roof.

When there is a lot of homes for sale on the local market, or its what is referred to as a buyers market, the buyer can be pickier about the repairs needed and do. We do inspections and pre-sale certifications all the time. Be prepared in advance.

Replacing your roof before selling your home can give you peace of mind knowing that your property is in top condition and ready for sale.

All things considered, replacing your roof before selling your home can be a smart decision.

But ultimately, it’s up to you to decide if the benefits outweigh the costs. If you choose to replace your roof, make sure to hire a reputable local contractor like Denny’s Roofing who can give you a written estimate and provide references for previous roof replacement projects.

Once your roof is in good condition, you’ll be able to list your home with confidence knowing that you’ve done everything you can to ensure the best possible sale price and a smooth sale. Good luck!